Did you think I fell off the face of the Earth? I may have... I got a little buried in this kitchen mess. It's coming together though. Finally. It has given me permanent dark circles under my eyes I think.
Moving on. I took pictures of this over a month ago. Like I said, fell off the planet. Anyway, I decided maybe it was finally time to put together a tutorial on how I made this shirt:

What you'll need:
T-shirt
Bleach in a spray bottle
Freezer Paper
Iron
Exacto knife (Or Cricut, Silhouette, etc.)
First, cut out the image you want to use out of the freezer paper. I used the exacto knife to do this one, but I plan on using my Cricut to do some more).

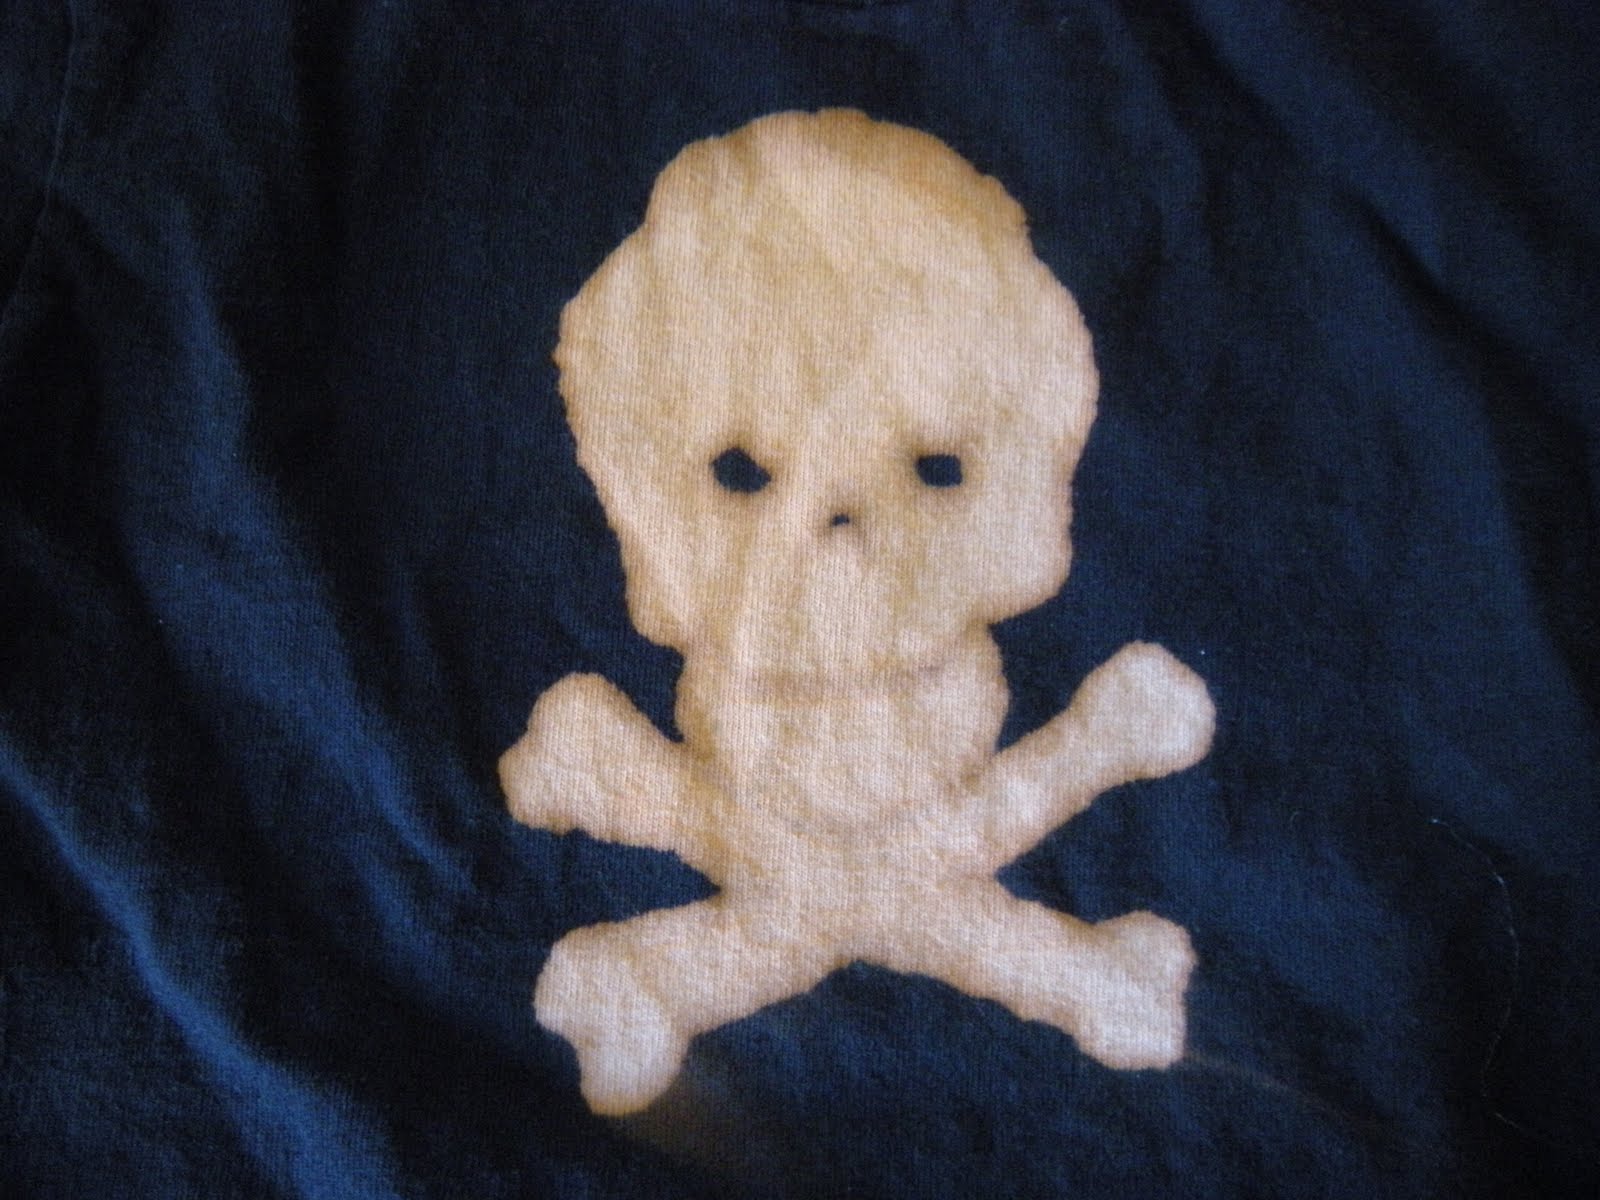
Iron your image on to the front of your shirt (shiny side of the paper down). Make sure all the edges are ironed down really well, and if you have any little pieces that you DON'T want bleached, iron them on now. For the skull, it was the eyes and nose.

I like to iron a piece of freezer paper to the inside of my shirts too. You could also use a towel or a piece of cardboard or simply slide the paper in there. I like to iron it so it can't move. Also, make sure that any parts of the shirt that you don't want bleached are covered. Again, I just throw some scraps of freezer paper over the rest of the shirt.

Now comes the fun part. It's not so often that we bleach something on purpose. :) Very lightly spray a little bleach on the shirt. Like barely squeeze that trigger. And keep your bottle back at least a foot. It should be more of a bleach shower than flood on your shirt. You should see it start to change almost instantly. You can do another tiny squirt if you want. But I promise you, you will regret it if you go overboard with the bleach. Ugly things happen...

On this green shirt, I left the bleach on for about 10 minutes. It really didn't look like it was doing much and ended up being fairly subtle, which is what I wanted. It just took forever. On the black shirts, I run them to the sink when the bleach has been on for only 15 seconds or so. They go super fast. If you wanted the image to be a little more solid, leave the bleach on for a little longer, but watch it closely. I leave the stencil and everything on and run it under the water for a minute to stop the bleaching action. The freezer paper peels right off when it's wet, so don't worry about that.
I thought I'd show it on a black shirt, since the green was an awful example. This was on for 12-15 seconds.

The bleach was only on this one for about 20-25 seconds. See how it's getting more solid?

Wash your shirts as soon as you can. I know water stops bleach, but I figure if I like it right now, I'd better hurry and wash that bleach out so it doesn't have a chance to change on me. I just run them through a small, quick load in the washing machine. And don't add any extra bleach. ;)
This is how the green shirt looked out of the washer. It really didn't look like much until it had been washed.

I also added a helicopter to the front with another freezer paper stencil and fabric paint.

And I just realized I have no picture of the final product. Shame on me! I'll get on that and add it when I get it.
If you have any questions, let me know! And thanks for reading!
PS, notice the nasty brick counter tops? And the holes in the wall and uncovered outlet that I had my iron plugged into? THEY'RE GONE NOW!!!! :)


